
You may need one clean excerpt from a meeting, a shorter intro for a podcast, a ringtone-length clip, or simply a way to remove silence. The safest workflow is to edit a local copy, choose the range deliberately, export to a new file, and listen across both cut points before deleting anything.
Before you cut: make three decisions
- Keep or remove? Decide whether the marked range is the piece you want to keep.
- Output format? MP3 is compact and widely playable; WAV or FLAC is preferable when a lossless intermediate matters.
- Output name? Use a descriptive new name such as
interview-answer-01.mp3.
Step-by-step: cut an MP3 locally
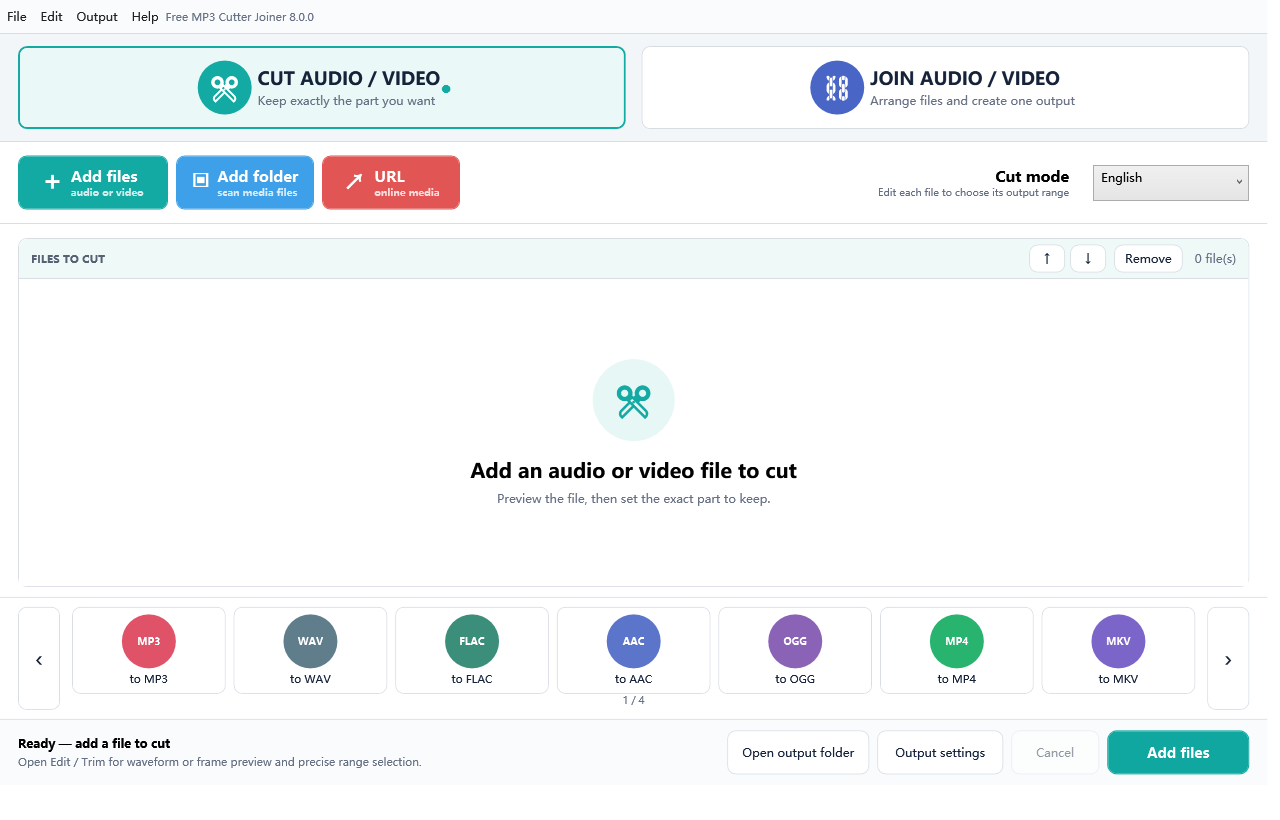
- Start in Cut mode. Open the app and keep Cut Audio / Video selected.
- Add your file. Use Add media, drag the file into the list, or add a folder when preparing several clips.
- Open the editor. Select the file and open the edit/trim view. Preview near the intended boundary before committing.
- Set the range. Enter or adjust the exact start and end times. Leave a fraction of a second around speech consonants or musical attacks when needed.
- Choose MP3 and the destination. Select an MP3 preset, verify the output folder, and keep the generated name distinct from the source.
- Run and verify. Play the first and last several seconds of the output and confirm the expected duration.
Will cutting an MP3 reduce quality?
MP3 is a lossy format. Any workflow that decodes and encodes it again can introduce another lossy generation. When the output must remain MP3, select a sensible quality preset and avoid repeatedly editing the newly exported file. If the clip will be edited again, save a WAV or FLAC intermediate and make the final MP3 only once.
Five mistakes that make a good cut sound bad
- Cutting exactly on the first visible syllable instead of leaving a tiny lead-in.
- Removing room tone so abruptly that the edit sounds unnatural.
- Saving over the only copy of the original.
- Judging the cut from the middle instead of listening across both boundaries.
- Choosing a low bitrate just to make a short clip even smaller.
Why use an offline MP3 cutter?
Local editing avoids sending confidential interviews, voice notes, client calls or unreleased music to an upload service. It also removes upload limits and makes large files practical on slower connections. Free MP3 Cutter Joiner performs the media operation on your Windows PC; it does not require an account for the cutting workflow.
Cutting several files without losing track
Batch work fails most often because inputs and outputs become difficult to identify. Create a project folder with separate source and exports subfolders. Add the source files, cut one representative file first, confirm the chosen preset, then continue with the remainder. Include a short range or purpose in every output name—for example lesson-04-00m35s-to-02m10s.mp3. This makes it possible to audit the result without opening every file.
When sources have different recorded levels or codecs, do not assume one quality choice is perfect for all of them. A spoken memo does not need the same delivery bitrate as music. If the clips will later be joined, consider exporting lossless WAV or FLAC intermediates so the final joined MP3 is the only additional lossy encode.
How to verify a cut professionally
- Compare the output duration with end time minus start time, allowing a small codec/container tolerance.
- Listen from at least two seconds before the intended content through two seconds after it begins.
- Repeat the same check at the end boundary.
- Seek near the middle to confirm the output is not merely a short header or silent file.
- Play or decode to the end in a second media tool.
- Confirm the original file’s timestamp and content have not changed.
This takes less than a minute for a short clip and catches the most expensive failures: wrong range, wrong source, muted audio, truncated export and accidental overwrite.
FAQ
Can I cut WAV, FLAC, M4A or OGG too?
Yes. The same Cut mode accepts common audio formats including WAV, FLAC, M4A, AAC, OGG, OPUS, WMA, AIFF and AC3, plus common video containers.
Does it delete my original?
The tested workflow writes a separate output and verifies that source hashes remain unchanged.
Can I cut audio from a video?
Yes. Add the video, define the range, then choose an audio output preset such as MP3 or WAV.
Authoritative references
Microsoft lists MP3, WAV, M4A, AAC and FLAC among Windows Media Player file types. FFmpeg’s official documentation explains the difference between stream copying and transcoding. See Microsoft Support and FFmpeg documentation.